The process of creating a standout virtual tour boils down to a four-part workflow: smart planning with a shot list, capturing the 360° media, using AI-powered tools for enhancements, and finally, getting the tour in front of buyers on the MLS, websites, and social media. Thankfully, modern platforms like BrightShot have made this incredibly straightforward, turning your raw footage into a polished, interactive experience in just minutes.
Why Virtual Tours Aren’t Just a “Nice-to-Have” Anymore
Let’s be honest—the way people browse for homes has completely changed. A gallery of static photos and a short property description just doesn’t cut it anymore. Today’s buyers expect to walk through a property from their living room, and a virtual tour is the only way to give them that experience. This isn’t a fleeting trend; it’s the new baseline.
This shift comes from a buyer’s need for convenience, transparency, and a real emotional connection. A thoughtfully produced tour lets someone truly get a feel for the home’s layout, judge room sizes accurately, and start imagining their life there before they even think about scheduling a showing. It establishes an immediate sense of trust by offering a transparent, unfiltered look that photos can never quite capture.
The Real Power of Immersive Experiences
For real estate agents, the advantages are massive. A virtual tour is one of the best filtering tools you have. It helps weed out the casual lookers from the genuinely interested buyers right from the start.
By giving them a comprehensive preview, you drastically cut down on unproductive showings, which saves an incredible amount of time for both you and the seller. This lets you pour your energy into high-intent leads who are already sold on the home’s potential.
The real magic of a virtual tour is that it pre-qualifies buyers on an emotional level. By the time they step through the front door for a physical showing, they’re already picturing where their furniture will go.
The numbers don’t lie. Listings that feature virtual tours get 87% more views, and potential buyers stick around on those pages 5-10 times longer. Even better, homes with tours tend to sell 31% faster and for 9% higher prices. These aren’t just vanity metrics; they represent a significant impact on your business. You can dive deeper into more real estate virtual tour statistics to see the full picture.
Making Professional-Grade Tours Accessible to Everyone
It wasn’t long ago that producing a high-quality virtual tour was a major headache—expensive, time-consuming, and technically demanding. Today, that barrier to entry has all but disappeared. Powerful platforms like BrightShot now use AI to do the heavy lifting for you, handling everything from stitching images to virtual staging and fixing poor lighting.
This screenshot gives you a glimpse of how a simple dashboard can deliver some seriously impressive results, transforming a standard photo into a polished, marketing-ready shot with a single click. The takeaway here is that you no longer need a deep technical background or expensive software to get professional results.
This technology empowers individual agents and photographers to create marketing assets that once required a whole team of editors. It’s also the perfect complement to your other visual marketing. For example, learning how aerial photography for real estate can be combined with a virtual tour provides buyers with an even more compelling and complete view of the property.
Crafting Your Virtual Tour Shot List
Great virtual tours don’t happen by accident. Before you ever pull out a camera, the most critical part of the job is mapping out your shots. This shot list is your game plan, ensuring the final tour feels like a natural, compelling journey through the home, not just a random collection of disconnected rooms.
The best way to start is to put yourself in a buyer’s shoes. Walk the property exactly as they would, starting from the front door and moving through the space logically. Your goal isn’t just to capture every corner, but to tell the story of the home in a way that feels intuitive and inviting.
Identify the Money Shots
Every single property has features that make buyers’ eyes light up. We call these the “money shots,” and they need to be the stars of your virtual tour. Nailing these shots right away is how you grab and hold a buyer’s attention.
Here are the non-negotiables that should always be on your list:
- The Kitchen: It’s almost always the heart of the home. Plan to capture it from several angles, making sure to highlight the island, countertops, high-end appliances, and overall layout.
- The Primary Suite: This is the buyer’s personal retreat. You need to showcase the scale of the bedroom, any walk-in closets, and of course, the en-suite bathroom. Double vanities, soaking tubs, or custom tile work are huge selling points.
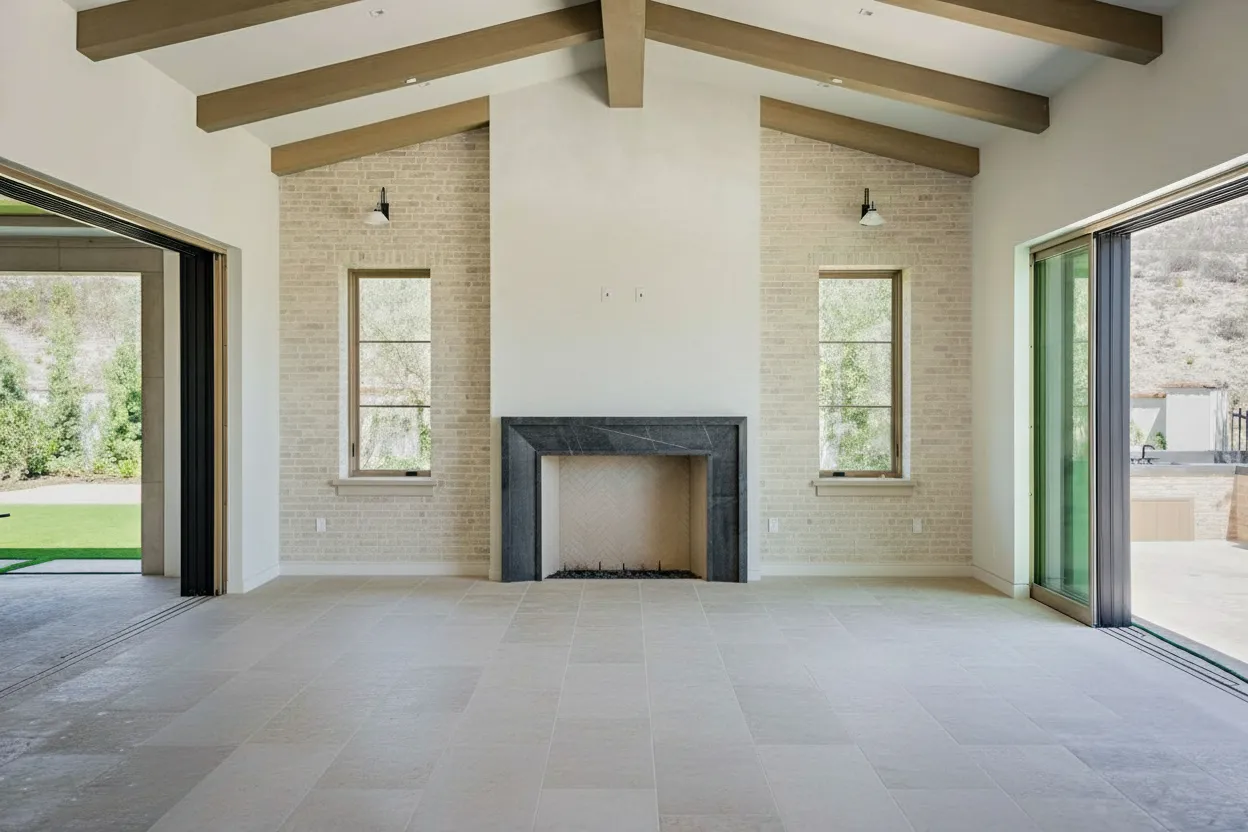
- Living and Family Rooms: These are the main gathering areas. Your shots should convey a sense of comfort, flow, and spaciousness where a family can picture themselves relaxing.
- Outdoor Living Spaces: Never underestimate a great backyard, patio, or deck. In today’s market, outdoor space is a massive draw. Capturing it well shows buyers the full lifestyle the property offers.
Think of it as guiding the viewer by the hand. You wouldn’t jump from the basement to the master bedroom in a real-life showing, so don’t do it in your tour. A seamless flow is what separates the pros from the amateurs.
This kind of careful planning is what directly leads to more engagement and, ultimately, faster sales.

As you can see, a well-executed tour isn’t just a cool feature—it’s a powerful tool that gets more eyes on the listing and keeps them there longer.
Prepare the Property for Its Close-Up
With your shot list locked in, it’s time to get the property camera-ready. Honestly, the most expensive 360° camera on the market can’t fix a cluttered, dark room. Prepping the space is just as crucial as the photography itself.
First up: decluttering. This is completely non-negotiable. Get rid of personal photos, stacks of mail, extra furniture—anything that distracts from the home’s actual features. You’re creating a blank canvas so buyers can imagine their own life there.
Next, it’s all about the lighting. Open every blind and curtain to flood the rooms with natural light. Then, turn on every single light in the house. I’m talking lamps, overhead fixtures, and even the under-cabinet lighting in the kitchen. Bright spaces feel bigger, cleaner, and far more welcoming on camera.
A potential buyer is clicking through the home at their own pace. One messy corner or a poorly lit room can completely break that immersive feeling and make them click away. Your prep work is what makes every single viewpoint count.
Finally, think about some simple staging. This doesn’t mean you need to spend a fortune. A bowl of green apples on the kitchen counter, a few fresh, neatly folded towels in the bathroom, or well-placed throw pillows on a sofa can add a necessary touch of life and style. These small details make an enormous impact.
Nailing Your Virtual Tour: The Gear and Capture Strategy

You don’t need a truckload of expensive equipment to start creating professional virtual tours. The key is choosing the right gear for your workflow, because your camera choice directly impacts your time on-site and in front of the computer.
When it comes to capturing the images, you’re looking at two main paths: the all-in-one 360° camera or the more traditional DSLR/mirrorless camera paired with a panoramic tripod head. Each has its place, and the best one for you depends entirely on what you’re trying to achieve—speed and volume, or ultimate image quality.
Comparing Virtual Tour Capture Methods
The first big decision you’ll make is how you’re going to capture the 360° panoramas. A dedicated 360° camera is built for speed, while a DSLR setup gives you granular control over every pixel. Here’s a quick look at how they stack up.
| Method | Pros | Cons | Best For |
|---|---|---|---|
| 360° Camera | Incredibly fast on-site; just drop the tripod and click. The workflow is simple, and the initial investment is lower. | Image quality and dynamic range aren’t as high. You have less creative control over the final shot. | High-volume photographers and agents who need to turn properties around quickly. |
| DSLR/Mirrorless | Unmatched image quality with incredible detail and dynamic range. You have full control over every setting. | A much slower process on-site, requiring multiple photos per panorama. You’ll need stitching software and more editing time. | Photographers working on luxury listings where every detail matters and premium quality is the main selling point. |
For a lot of us in the fast-paced world of real estate, the efficiency of a modern 360° camera from brands like Insta360 or Ricoh Theta is a game-changer. The time you save on location and in post-production is a huge win, often making the slight dip in resolution a worthwhile trade-off. If you’re weighing your options, our guide on the best 360 virtual tour software can help you see which hardware plays best with different platforms.
The Camera Settings That Make or Break Your Shots
No matter what camera you’re using, your settings are what separate amateur shots from professional ones. Interiors are tricky; you’re almost always dealing with bright windows and dark, shadowy corners in the same frame.
The secret weapon here is bracketing. This technique involves firing off a burst of photos at different exposure levels—typically one underexposed, one normal, and one overexposed. Later, you merge these into a single High Dynamic Range (HDR) image. This process pulls out all the detail, so you can see the view outside the window and the beautiful details in the room’s darkest corner.
To get it right, you’ll need to juggle a few key settings:
- ISO: Always keep your ISO as low as you can, ideally between 100 and 400. This is your best defense against grainy, noisy photos. The only way to do this effectively is with a tripod, which keeps the camera perfectly still for longer exposures.
- Aperture (f-stop): Set your aperture to a sweet spot like f/8 or f/11. A narrow aperture like this creates a deep depth of field, ensuring everything from the chair in the foreground to the art on the back wall is perfectly sharp.
- Shutter Speed: This is the setting you’ll let the camera adjust automatically. With your ISO and aperture locked in, the camera will vary the shutter speed to create the dark, medium, and bright shots needed for your HDR bracket.
Your tripod isn’t just an accessory; it’s the most critical piece of gear you own. It’s what allows you to use the low ISO and slow shutter speeds necessary for crisp, noise-free, and professional-looking interior photos. Never, ever shoot a virtual tour handheld.
Tripod Placement Is Everything
Where you place your camera is just as crucial as how you set it. Your goal is to give potential buyers a natural, inviting sense of the space.
As a rule of thumb, set your tripod to a consistent height for every shot, usually around 5 feet (or 1.5 meters). This simulates a natural eye-level view, making the tour feel more immersive and less disorienting.
In each room, find the “hero” spot—a central location that gives a clear view of the room’s best features and any connecting doorways or hallways. This creates logical pathways for the user to follow. Try to avoid putting the tripod right up against a wall or in a tight corner; this can warp the perspective and make a room feel cramped and distorted.
And don’t forget to look up! For properties with impressive acreage, a pool, or unique architecture, adding aerial shots can be a huge differentiator. A good guide to using a drone for real estate can show you how to capture those jaw-dropping perspectives that will complete the story of the property. Combining beautiful ground-level panoramas with sweeping aerial views gives buyers the full picture.
Editing and Enhancing Your Tour with AI

Getting the shots on-site is only half the battle. The real magic—turning those raw files into a captivating tour that sells—happens on the computer. This used to mean hours of tedious, manual editing, but AI-powered platforms have completely rewritten the rules.
Forget painstakingly stitching panoramas or spending an entire afternoon color-correcting a single room. The new workflow is about speed and intelligence. Tools like BrightShot are built for this very purpose, letting you take your raw 360° captures or still photos and produce a polished, MLS-ready virtual tour in minutes, not days.
With an AI-first approach, you can import your files and immediately apply powerful enhancements with a single click. The focus has shifted from just fixing problems to actively marketing the property’s best attributes, instantly.
One-Click Transformations for Instant Impact
We’ve all been there. You arrive at a property to find it’s completely vacant, still filled with the owner’s personal clutter, or you’re stuck shooting under a flat, gray sky. In the past, these were deal-breakers or, at best, a huge time sink in post-production. Now, they’re simple fixes that take just a few seconds.
AI editing gives you an entire toolbox of one-click solutions for the most common real estate photography headaches. It’s a world away from traditional software that demands deep technical know-how and a huge time commitment.
Here are a few of the most valuable AI enhancements you can use:
- AI Virtual Staging: Fill an empty space in seconds by choosing from over 80+ interior design styles. This is crucial for helping buyers imagine themselves living in the home.
- Intelligent Decluttering: Clean up a room by removing distracting items. Think personal photos, magnets on the fridge, or toys on the floor. The result is a clean, universally appealing space.
- Day-to-Dusk Conversions: Turn a standard daytime exterior shot into a stunning twilight photo. These “hero shots” are absolute gold for grabbing attention on listing sites.
- Sky and Lawn Replacement: Instantly swap a dull, overcast sky for a perfect blue one, or transform a patchy, brown lawn into vibrant green grass.
This isn’t just about cleaning up photos; it’s about elevating the property’s perceived value and making it stand out to a much wider audience.
The modern editing workflow isn’t about being a Photoshop wizard. It’s about knowing which AI tool to click to solve a specific marketing problem—like making an empty room feel like a home or ensuring the main listing photo has a perfect, eye-catching sky.
To see these tools in action, this https://bright-shot.com/blog/ai-real-estate-photo-editing-guide/ offers a great breakdown of what’s possible and how to get the best results.
From Still Photos to Cinematic Walkthroughs
The utility of AI doesn’t stop with static 360° images. Video is king on social media, and modern platforms give you a massive shortcut to creating it. A standout feature in tools like BrightShot is the ability to automatically convert your still photos—whether from a DSLR or a 360° camera—into a slick video walkthrough.
The process is incredibly straightforward. You upload your edited stills, and the AI engine gets to work, generating a smooth video with Ken Burns-style pans and zooms. It feels like a professional videographer gliding through the home, but it was all created from your photos.
From there, you can add your logo, contact info, and choose from different video templates. The system can even write AI-generated captions to describe each room. You’re left with a shareable, bite-sized video perfect for Instagram Reels, TikTok, or Facebook. For those wanting even more creative control, there are specialized tools for creating AI for real estate marketing videos that offer deeper customization.
Finalizing Your Tour with Seamless Stitching
Once your individual images are looking their best, the final piece of the puzzle is assembling them into a cohesive, interactive tour. Whether you have bracketed DSLR shots or a folder of equirectangular 360° files, an AI platform automates the entire assembly line.
First, if you shot with a DSLR, the software merges your bracketed exposures into a single, beautifully lit High Dynamic Range (HDR) image for each camera position.
Next, it stitches these individual photos together to create flawless 360° panoramas, completely removing any fisheye distortion or visible seams.
Finally, the platform links all your panoramas together, building the interactive “hotspots” that let users navigate from room to room. This automated process guarantees your final tour is not just visually impressive but also technically perfect and a breeze for buyers to explore. You can then add floor plans or info tags before publishing it to the world.
Getting Your Virtual Tour Seen: A Guide to Smart Promotion
You’ve created a gorgeous virtual tour. That’s a huge accomplishment, but the job isn’t finished. A brilliant tour that nobody sees sells zero homes. Now it’s time to shift from creator to marketer and make sure your work gets the attention it deserves.
The idea is to put your tour everywhere a potential buyer might be searching. This isn’t just about dropping a link here and there; it’s about weaving the tour into the very fabric of your marketing. Thankfully, modern tools make this easier than you might think. Platforms like BrightShot are built for this, giving you simple sharing and embedding options that fit right into a real estate workflow.
First, Optimize Your Tour for Search and Listings
Before you share anything, a few minutes of optimization can make a world of difference in how many people find your tour organically. Search engines and real estate portals are hungry for rich media, and a virtual tour is a five-star meal for their algorithms.
It starts with the simple things, like file names and descriptions. Think like Google. A generic file name like final_tour.mp4 is a missed opportunity. Instead, name it something descriptive and keyword-focused, like 123-elm-street-real-estate-virtual-tour.mp4. When you upload it to a listing, write a compelling description that includes the address and key features. Be sure to naturally weave in phrases buyers search for, like “interactive 360 tour” or “full property walkthrough.”
This basic SEO helps your listing climb the ranks not only on Google but also within major portals like Zillow and Realtor.com. Their systems are designed to reward listings that offer a richer, more complete experience for home shoppers, and virtual tours are a massive check in that box.
A well-optimized virtual tour does more than just show off a home. It sends a powerful signal to listing platforms that your property is a premium offering, worthy of a top spot in search results.
This isn’t just a nice-to-have anymore; it’s essential. The virtual tour market soared to $2.18 billion by 2023 for a reason. Homes with tours get 87% more views and see buyers linger 5-10 times longer. These aren’t just vanity metrics—they represent a huge opportunity to grab and hold a buyer’s attention right from the start.
A Smart Distribution Plan for Every Channel
With your tour polished and optimized, it’s time to get it out there. Think of your tour as a core marketing asset you can slice up and share across different platforms to pull people in and generate leads.
Your game plan should cover these essential channels:
-
The MLS: This is your top priority. Nearly every MLS today has a dedicated field for a virtual tour link. Use it. This is the single most important step for syndicating your tour to thousands of other real estate websites and portals.
-
Your Website & Blog: Don’t just link to the tour—embed it directly onto the property’s landing page. This keeps potential buyers on your website, where you control the branding, calls-to-action, and lead capture forms.
-
Social Media: A simple link post won’t cut it. You need to create a hook. Use a tool like BrightShot to generate a short, cinematic video clip from your tour’s still photos. Post that as an Instagram Reel or Facebook video, with a caption that tempts viewers to click through for the full, immersive experience.
-
Email Marketing: Send the tour directly to your buyer database. For maximum impact, segment your list and target subscribers who have shown interest in similar properties. An email with a subject line like “New Virtual Tour: 123 Elm Street Is Now Open Online” is far more likely to get opened than another generic listing alert.
This multi-channel approach ensures you’re meeting buyers where they already are. It also works hand-in-hand with other marketing efforts, like planning some great open house ideas for real estate agents, to create a truly comprehensive campaign. When you make your tour accessible everywhere, it stops being just a viewing tool and becomes a powerful lead-generation machine.
Common Questions About Creating Virtual Tours
Even after you get the hang of the tech, a few practical questions always pop up when you’re getting started with virtual tours. It’s totally normal. Getting straight answers to these common concerns is the best way to avoid early mistakes and start producing professional-quality work right away.
Let’s tackle some of the things agents and photographers ask most often. The goal here is to show you that creating incredible virtual tours is well within your reach.
How Much Does a Real Estate Virtual Tour Cost?
The cost can swing wildly, but the good news is you’ve got options for just about any budget.
On one end of the spectrum, you can try a DIY approach with a modern smartphone for next to nothing. It’s a fine way to experiment, but the quality probably won’t impress serious buyers, making it a poor long-term strategy.
A much better starting point is to invest in an entry-level 360° camera. Models from brands like Ricoh or Insta360 usually run between $300 and $500. This one-time purchase is a game-changer for both your efficiency and the final quality of your tour.
If you want to be completely hands-off, hiring a dedicated virtual tour provider can cost anywhere from $250 to over $1,000 for a single property. The price depends heavily on the home’s size and what services are included.
A great middle ground is using an AI-powered platform. These services bundle everything—editing, hosting, and even virtual staging—into one subscription, saving you a ton of time and the cost of multiple software licenses.
Can I Really Create a Tour with My iPhone?
You absolutely can. In fact, using your phone is a great way to get a feel for the process without spending a dime. The cameras on new smartphones are surprisingly good, and the panorama modes are perfect for capturing wide shots. You just have to take a series of overlapping pictures that you’ll stitch together later.
The big catch? It takes a lot of time. Manually stitching photos is a slow, tedious process, and it’s tough to avoid errors or lighting mismatches that scream “amateur.”
A smartphone is the perfect training ground for learning about shot composition and how a tour should flow. But once you’re ready to create seamless, high-quality tours consistently, you need to upgrade. A dedicated 360° camera and an AI editor will give you a polished result in a tiny fraction of the time.
How Long Does Making a Virtual Tour Actually Take?
For an average 2,000 sq. ft. house, the shoot itself is surprisingly fast. With a 360° camera, you can be in and out in about 45 to 90 minutes. The real time-sink has always been post-production.
Manually stitching, color correcting, editing out your reflection, and virtually staging an empty home used to be a multi-day job. It required hours of focused, tedious work. This is where AI completely changes the game.
Now, you can upload images straight from your camera to an AI platform and get a fully stitched, color-corrected, and even virtually staged tour back in minutes. That incredible speed means you can get your listings live faster, which is a massive advantage in today’s market.
What Are the Most Common Mistakes to Avoid?
I see a lot of first-timers make the same few mistakes that, unfortunately, can make a great property look less appealing. The good news is they’re all easy to avoid once you know what to look for.
Here are the most common slip-ups:
- Poor Lighting: Dark, gloomy rooms feel cramped and unwelcoming. Your first step at any property should be to turn on every single light and open all the blinds.
- Inconsistent Camera Height: When the camera height jumps up and down between shots, it’s disorienting for the viewer. Set your tripod to a consistent, natural eye level—around 5 feet is a good rule of thumb—and leave it there.
- Forgetting Key Areas: Don’t just shoot the main rooms. Buyers want to see the walk-in closets, the pantry, the garage, and even the laundry room.
- Leaving Personal Clutter: Family photos, kids’ drawings on the fridge, and general untidiness are distracting. It makes it hard for buyers to imagine themselves living there.
- Confusing Navigation: A tour that jumps around randomly is just frustrating. Plan your shots to guide the user through the home in a logical path, just as if they were walking through in person.
By planning your shoot and using a platform that can automatically fix things like lighting and clutter, you can easily sidestep these rookie mistakes.
Ready to create stunning virtual tours that sell properties faster? BrightShot gives you all the AI-powered tools you need—from virtual staging and decluttering to cinematic video creation—in one easy-to-use platform. Start your free trial today and transform your real estate marketing.