The fastest way to capture 360-degree photos for a real estate listing in 2026 is the iPhone you already own — not a $400-1,500 Ricoh Theta or Insta360. Whether you’re shooting a listing for the MLS, a vacation rental for Airbnb, or a virtual tour for Zillow, the iPhone’s native Panorama mode plus a couple of well-chosen apps gets you 90% of the result of a dedicated 360 camera at zero additional cost.
This guide walks through how to take 360 photos on iPhone in 2026 — every method that actually works, the gear that makes a real difference, the stitching software for converting iPhone panoramas into navigable 360° virtual tours, and the AI shortcut that lets you skip 360 capture entirely if all you need is a real estate listing tour.
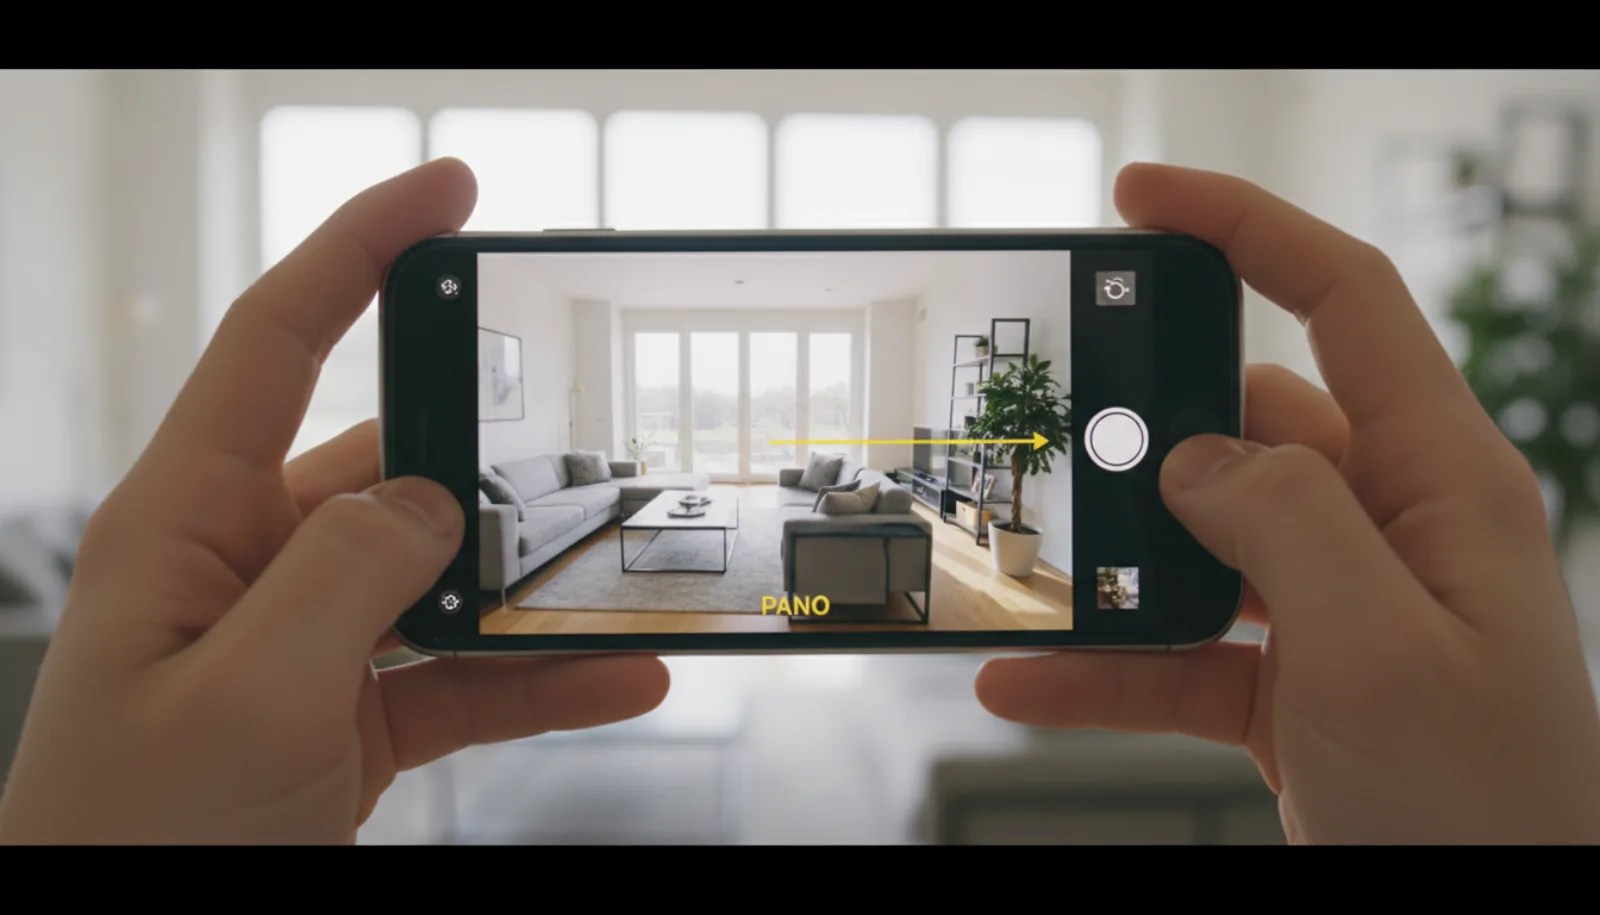
Method 1: Native iPhone Panorama mode (free, fastest)
The iPhone’s built-in Panorama mode has been part of iOS since iPhone 5 in 2012, and it’s still the fastest way to capture an ultra-wide horizontal sweep that covers most of a room.
Step-by-step:
- Open the Camera app
- Swipe right (or tap the mode selector) until you reach PANO
- Hold the iPhone in vertical (portrait) orientation — this captures more vertical pixels per frame
- Tap the shutter button
- Slowly rotate your body in a circle, keeping the iPhone pointed outward at chest height, following the arrow guide
- Aim for a steady, even rotation taking roughly 8-12 seconds for a full 360° sweep
- Tap the shutter again when the arrow reaches the right edge — or let it auto-stop when complete
The resulting image is a wide horizontal panorama, typically around 11,000 × 3,000 pixels. It’s not a true 360 photo (a real 360 photo is a full spherical / equirectangular image — Panorama mode only captures horizontally), but for many real estate use cases — showing a room’s full perimeter in a single image — Panorama mode is plenty.
When to use native Pano: quick MLS listing photos that need an ultra-wide angle, social media content, casual property documentation, anything where a flat panoramic image is acceptable.
When NOT to use it: building an interactive virtual tour buyers can navigate (need a real spherical 360), submitting to platforms like Matterport or Zillow 3D Home (need true 360 from a dedicated camera or stitched equirectangular).
For a walkthrough of the native Panorama mode specifically, this tutorial covers the basics:
Method 2: Third-party 360 apps (free or low-cost)
For true 360-degree spherical photos on iPhone — the kind you can pan around in 3D space, embed in virtual tours, and view on a VR headset — you need a third-party app. The three that consistently work in 2026:
Google Street View app
Free. The most reliable iPhone 360 capture app, even three years after Google stopped actively developing it. The “Camera” mode within Street View walks you through capturing 26+ individual photos (one for each section of a 360 sphere) and stitches them server-side.
- Output: true equirectangular 360 photo (typically 4,096 × 2,048 or higher)
- Workflow: open Street View → tap Camera → tap Camera again → orient the iPhone toward each prompted target and tap — the app captures and stitches automatically
- Time per 360: ~2-3 minutes per room
- Best for: real estate, hospitality, Google Maps business interior tours
Note: Street View can publish directly to Google Maps if you’re listing a business location.
Theta+ / Insta360 / Ricoh Theta companion apps
If you ever invest in a dedicated 360 camera (Ricoh Theta Z1, Insta360 X4, etc.), the camera’s iPhone companion app pairs over Bluetooth/Wi-Fi and lets you capture true 360s in one shot. One-second capture vs. the 2-3 minutes of stitching.
- Cost: $300-$1,200 for the camera (free app)
- Quality: meaningfully higher than iPhone-only stitching, especially in low-light interiors
- When to invest: if you shoot 5+ listings per month and 360 tours are a regular deliverable
Panorama 360 / 360 Panorama (App Store)
Several third-party paid iPhone apps ($5-10 one-time purchase) offer hand-stitched 360 capture without a dedicated camera. Quality is meaningfully worse than Street View but the workflow is more polished. Worth the price for occasional use; not worth it if you’re shooting weekly.
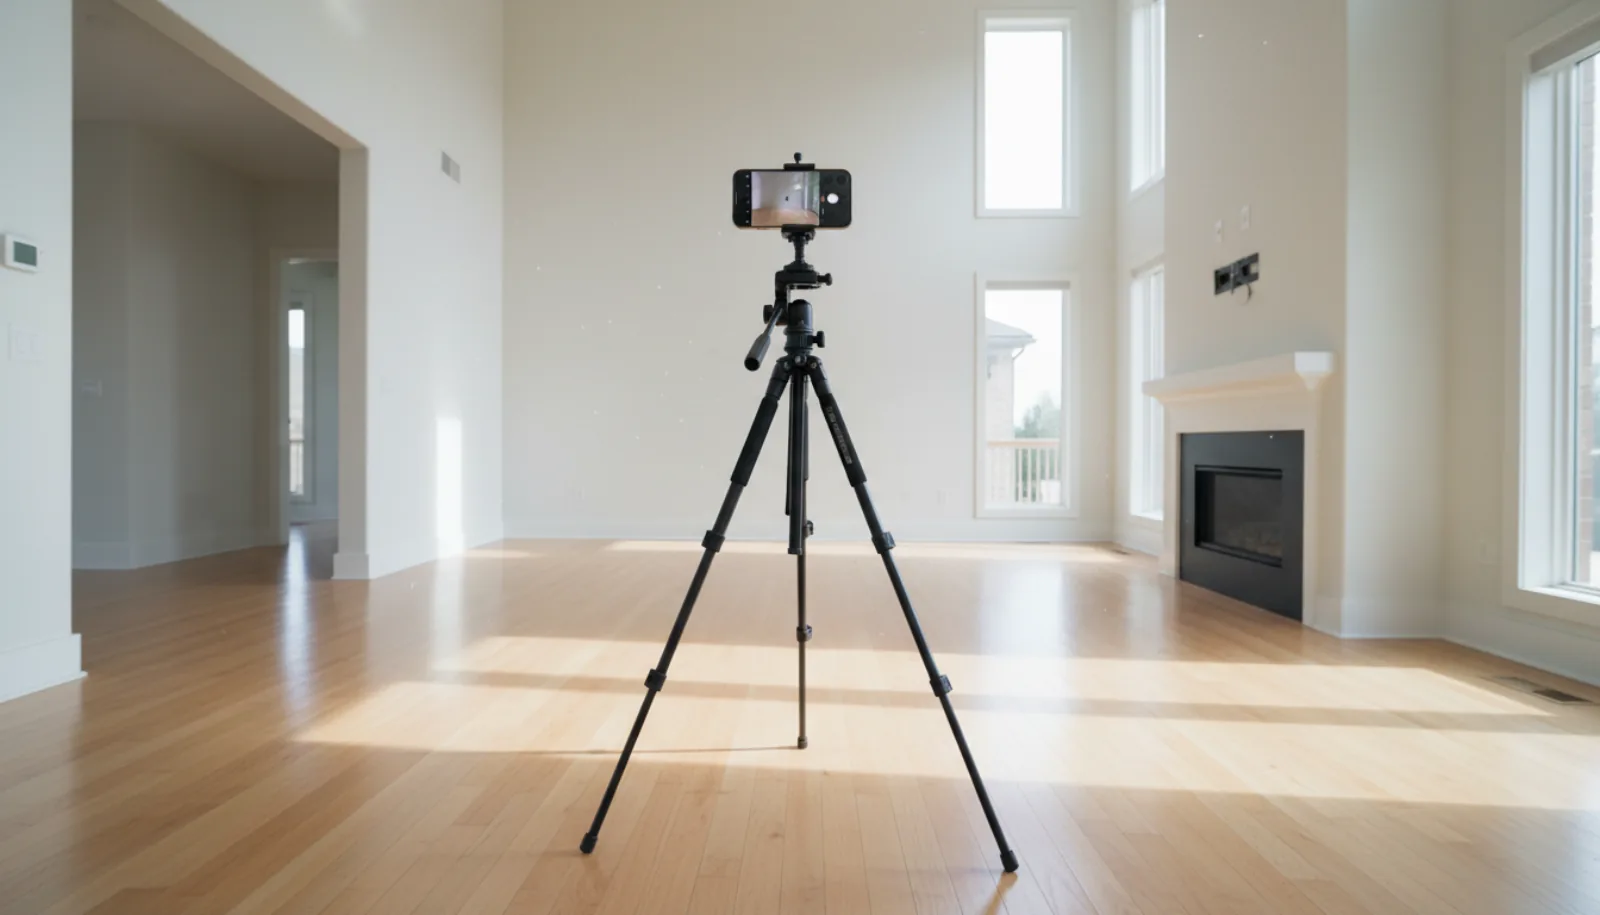
Method 3: iPhone + 360 rotator tripod (best free-ish quality)
For real estate agents serious about 360 capture without buying a 360 camera, the iPhone-on-a-tripod-with-a-360-rotator-head setup is the sweet spot:
Gear:
- Sturdy tripod with bubble level (~$40-150)
- iPhone tripod mount adapter (~$15)
- 360 rotator head (~$30-50) — clicks to fixed angles, ensuring even spacing between shots
Process:
- Place tripod in center of room at ~5-foot height (eye level for most viewers)
- Mount iPhone in portrait orientation
- Open Camera app in regular Photo mode
- Capture one photo
- Rotate 30° with the rotator head’s click stop
- Capture another photo
- Repeat for full 360° — typically 12 photos for full coverage with overlap
- Stitch the 12 photos in software (next section)
Result: a true equirectangular 360 image with materially better sharpness, dynamic range, and low-light performance than Street View’s auto-stitch. Still not as good as a Ricoh Theta Z1, but the gap closes considerably.
Stitching iPhone photos into a 360 image
If you went the tripod + rotator route, you have a stack of 12 photos that need stitching. Three options:
PTGui (paid, best quality)
PTGui is the industry-standard stitching software. Mac and Windows desktop app, $300+ license. Best-in-class stitching quality for high-resolution panoramas. Worth it if you’re producing 360 tours commercially.
Hugin (free, open source)
Hugin is the free, open-source equivalent of PTGui. Slightly more technical to use, but the stitching engine is the same one PTGui uses under the hood (Hugin is built on the same libpano library). Free is hard to beat.
iPhone-only apps with auto-stitch
Apps like Photo Stitcher 360, AutoStitch Panorama, and 3D 360 Photo Maker stitch on-device for ~$5-10. Quality is lower than desktop but acceptable for casual use. Best for agents shooting one-off 360s for social, not full virtual tours.
The output of any of these is an equirectangular image (typically 6,000-12,000 pixels wide, 3,000-6,000 tall, in 2:1 aspect ratio) that can be uploaded to virtual tour platforms.
Converting iPhone 360 photos into a real estate virtual tour
A 360 photo on its own isn’t a virtual tour — it’s one room. A virtual tour is multiple 360 photos linked together with hotspots so viewers can navigate from room to room.
Free platforms that accept iPhone-captured 360 panoramas:
- Kuula — free tier accepts equirectangular images, builds tours, decent hotspot UI
- Google Tour Creator — discontinued in 2021 but Google Street View itself still hosts 360s
- Roundme — free tier with limited tours
- CloudPano — free tier with watermark, paid plans $19-125/month
Paid platforms that produce more polished output:
- Matterport — $1,500 camera + $69+/month — gold standard but expensive
- 3DVista — desktop authoring tool, one-time license
- CloudPano Pro — $19-125/month, accepts both iPhone 360s and dedicated 360 camera output
For most working real estate agents, the practical bottleneck isn’t the capture (iPhone + tripod handles it) — it’s the hosting and tour-builder platform that wraps multiple 360s into a navigable buyer experience.
The AI shortcut: skip 360 capture entirely
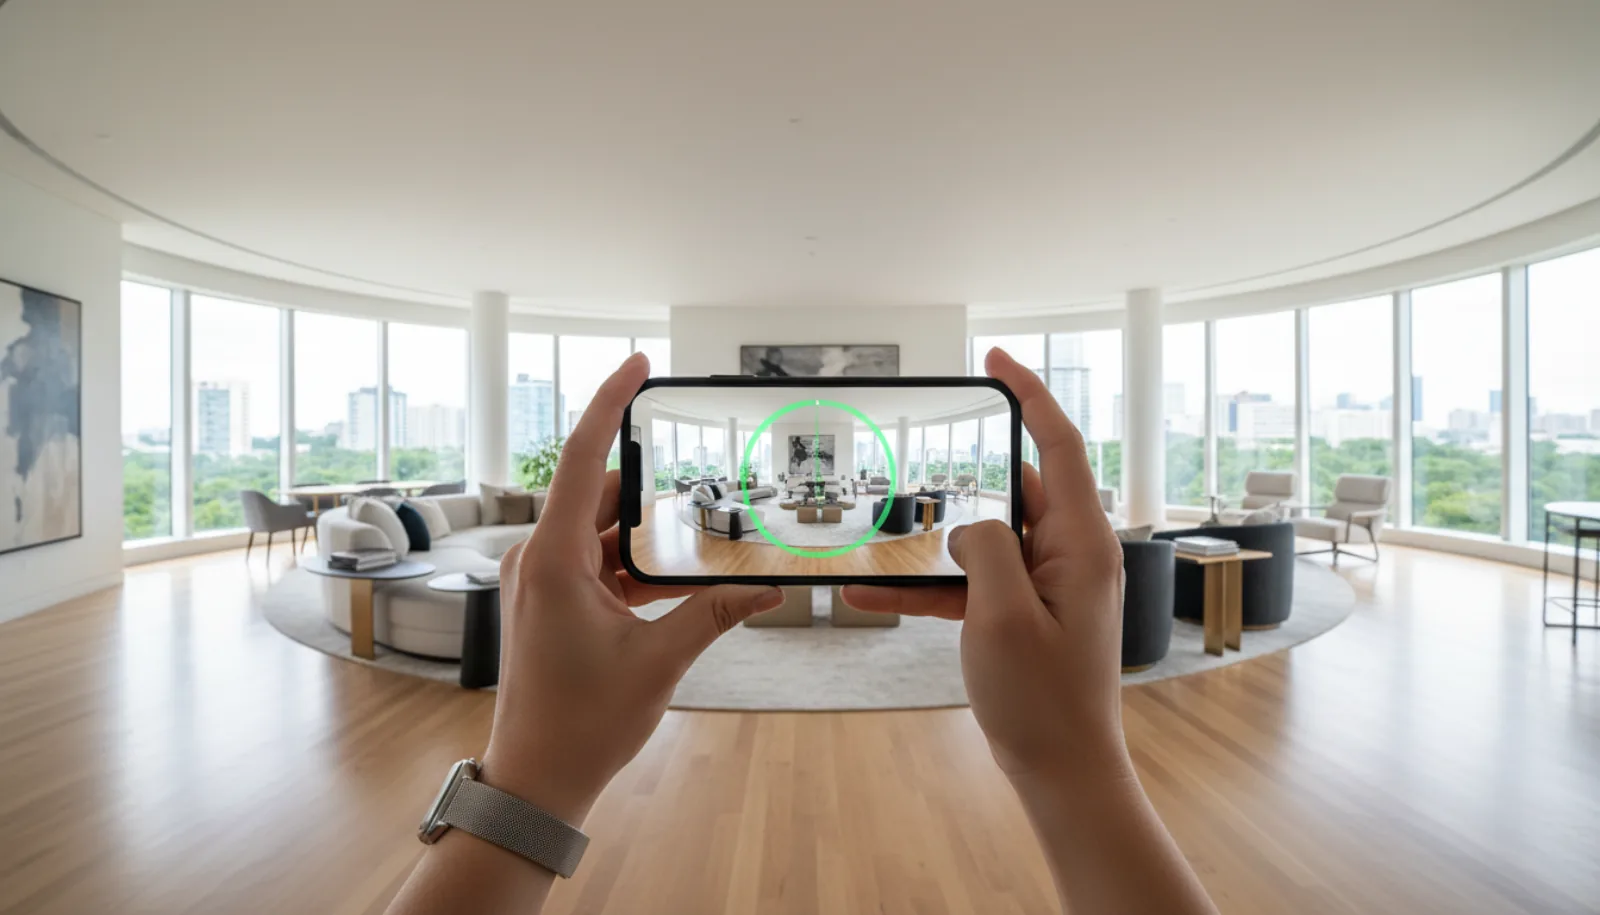
Here’s the part most “how to take 360 photos on iPhone” tutorials skip in 2026: you don’t actually need to capture a 360 image to publish a 360 virtual tour anymore.
Modern AI virtual-tour tools take regular wide-angle iPhone photos (the kind every agent already shoots for the MLS) and assemble them into a navigable 360 walkthrough with auto-placed hotspots — no Panorama mode, no tripod-rotator, no stitching software.
The workflow:
- Shoot 8-12 regular iPhone photos of the property — one from each corner of each room, plus exterior shots. Just normal photos in normal Camera mode. ~20 minutes for a 3-bedroom home.
- Upload them to an AI virtual-tour platform (BrightShot, Kuula AI mode, etc.)
- The AI infers spatial relationships between photos, places hotspots automatically, builds the tour
- Publish the tour with a single embed URL — works on Zillow, Realtor.com, Redfin, IDX websites, Airbnb, VRBO
Total time: ~30 minutes from shoot to live virtual tour. Compare to: 2-3 hours for tripod+rotator+stitching workflow, or $1,500+ for a Matterport setup.
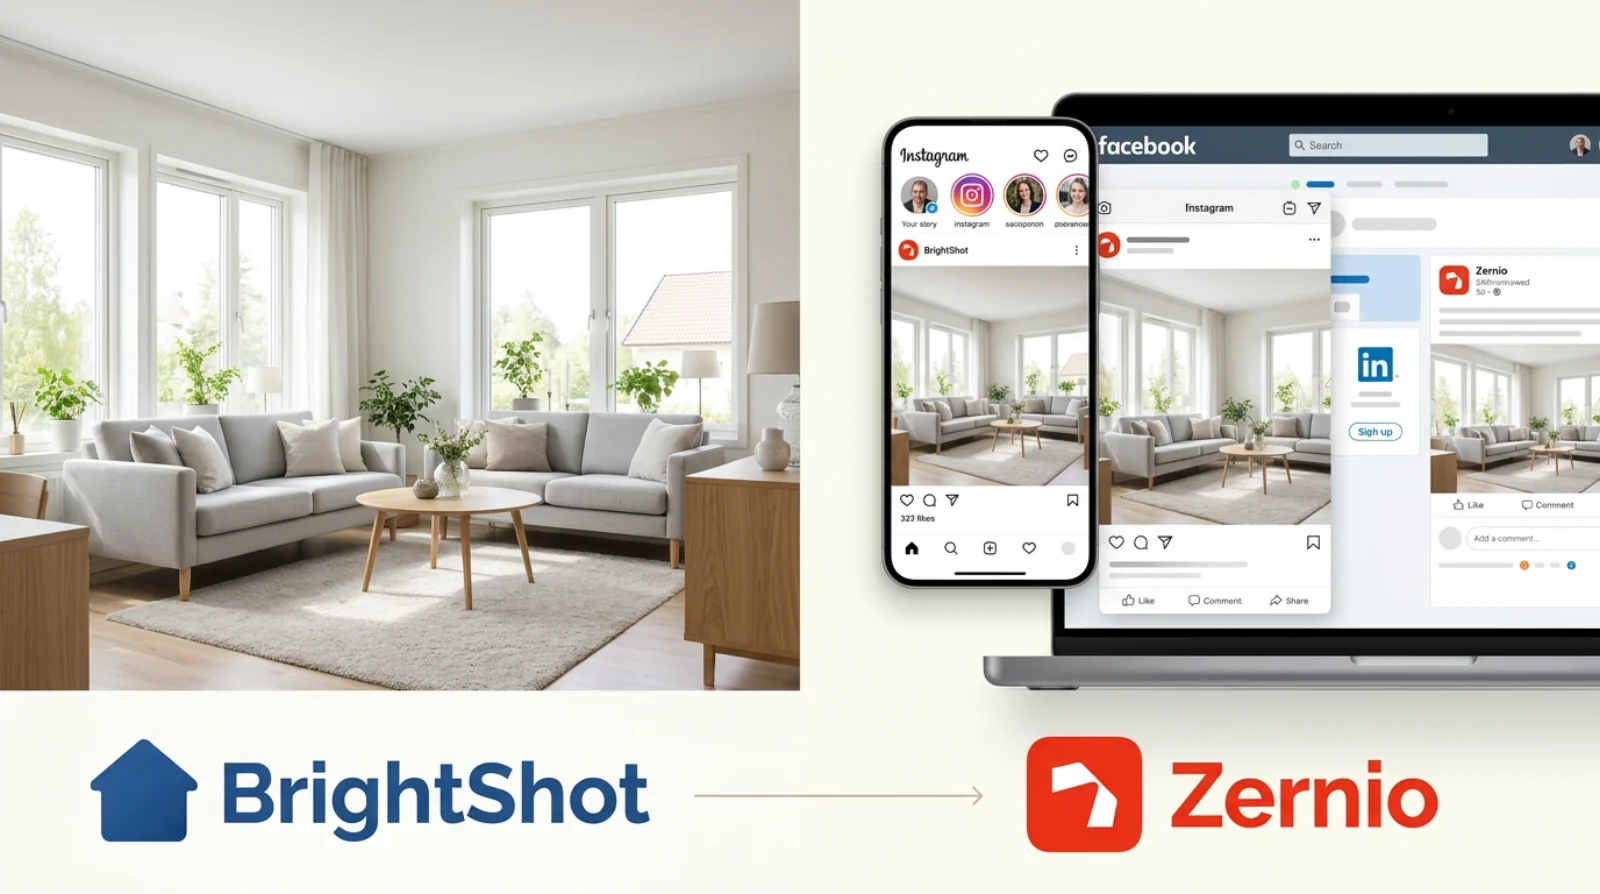
🏠 Skip the 360 camera entirely. BrightShot builds a navigable 360° virtual tour from the regular iPhone photos you already shot for the MLS — no Panorama mode, no tripod-rotator, no stitching software. Embeds anywhere with one URL. Try the free plan →
For a comparison of dedicated 360-camera workflows vs. iPhone-only capture for real estate specifically, BoxBrownie’s tutorial covers the trade-offs well:
Lighting and composition tips for iPhone 360 photos
Whether you’re using Panorama mode, Street View capture, or a tripod-rotator setup, the same lighting and composition principles apply:
Lighting:
- Mid-day natural light is best — between 10am and 3pm in most climates, when sun is high
- Open all blinds, turn on every interior light — iPhone’s HDR works best with abundant light
- Avoid back-lighting through bright windows during stitching — Street View especially struggles with extreme dynamic range between a dark interior and a bright window
Composition:
- Stand or place tripod in the center of the room — geometrically centered, not against a wall
- Eye level (~5 ft) — captures the buyer’s natural perspective
- Remove personal items, declutter — same rules as any listing photo
- Pre-stage furniture — couches squared up, beds made, kitchen surfaces clear
Common mistakes:
- Capturing 360s with the iPhone too close to a wall (forces extreme distortion)
- Shooting in low light → noisy, blurry stitches
- Moving the tripod during the rotator sequence → broken stitching
- Including the photographer in the frame on the seam (especially in Street View’s stitch)
For the broader real-estate-photo workflow that produces buyer-ready images regardless of capture method, our how to take real estate photos and equipment for real estate photography guides cover the gear + technique baseline.
Where iPhone 360 photos go: MLS, Zillow, social media
Once you have your iPhone-captured 360 image (or a tour built from multiple), the destinations:
| Destination | Format accepted | How to upload |
|---|---|---|
| MLS Matrix (most US MLSes) | JPG, single panorama, up to 50 photos | Upload as additional photos; tag as “panorama” if your MLS supports |
| Zillow listing | Comes from MLS IDX feed | Once on MLS, propagates automatically |
| Zillow 3D Home | Specific format — Zillow’s free 3D Home iPhone app required (uses iPhone TrueDepth sensor + LiDAR) | Capture in Zillow 3D Home app directly |
| Realtor.com | Comes from MLS feed | Automatic |
| Facebook / Instagram | Native 360 photo support — upload equirectangular JPG directly | Tag “360 photo” in caption; Facebook auto-detects 360 metadata |
| Airbnb / VRBO | Single panoramas as listing photos | Upload to listing photo gallery |
| Personal website / IDX | Embed via virtual tour platform (Kuula, CloudPano, BrightShot, etc.) | iframe embed |
FAQs
Can iPhone take 360 photos?
Yes, in two ways. (1) Native Panorama mode in the iPhone’s Camera app captures a wide horizontal panorama (not a true 360, but close — typically 270-340°). (2) Third-party apps like Google Street View stitch together 26+ individual photos into a true equirectangular 360 spherical image that can be navigated in 3D space and embedded in virtual tour platforms.
How do you take 360 photos on iPhone for free?
Two free methods: (1) The built-in iPhone Camera app’s Panorama mode — open Camera, swipe to PANO, hold portrait, tap shutter, rotate slowly. (2) Google Street View app (free on the App Store) — uses the “Camera” mode to capture and stitch a true 360 spherical image. Street View’s output is true equirectangular 360 which works in most virtual-tour platforms.
What’s the difference between Panorama mode and a real 360 photo?
Panorama mode captures a horizontal sweep — typically 180-340 degrees — as a wide flat image. It’s not interactive and can’t be navigated in 3D space. A real 360 photo is a spherical equirectangular image (typically 2:1 aspect ratio) that captures everything around the camera in every direction — you can pan, tilt, and explore in 3D inside a viewer. True 360 photos are what virtual tour platforms accept.
How many photos do you need to make a 360 photo with iPhone?
For Google Street View’s stitching, the app guides you through capturing 26 individual photos at fixed angles. For a tripod-rotator manual setup, 12 photos at 30° spacing typically gives good coverage with enough overlap for stitching software. For Panorama mode, it’s one continuous capture — no separate photos needed.
Do you need a 360 camera for real estate virtual tours?
Not anymore. In 2026, AI virtual tour platforms (BrightShot, Kuula’s AI mode, etc.) can build navigable 360 walkthroughs from regular wide-angle iPhone photos — no Panorama mode, no tripod-rotator, no Ricoh Theta or Insta360 required. Just shoot 8-12 normal photos of each room and the AI assembles them into a tour with auto-placed hotspots.
What’s the best 360 photo app for iPhone in 2026?
For free: Google Street View is the most reliable choice — well-maintained, produces high-quality equirectangular output, and integrates with Google Maps if you’re shooting a business. For paid: Insta360’s app paired with the Insta360 X4 camera is the gold standard if you’re investing in 360 capture seriously. For real estate specifically: AI virtual tour platforms that work from regular iPhone photos are more practical than any 360-specific app.
Can you upload iPhone 360 photos to Zillow?
Yes, indirectly. iPhone Panorama photos can be uploaded to the MLS as additional listing photos, where Zillow’s IDX feed picks them up. For Zillow’s specific 3D Home feature, Zillow’s free 3D Home iPhone app uses your iPhone’s TrueDepth sensor (iPhone 11+) to capture 3D-aware photos that build directly into Zillow’s 3D Home tour format. The 3D Home app is different from standard 360 capture.
How do you stitch iPhone photos into a 360 image?
Three options: PTGui (paid, $300+, industry standard), Hugin (free, open source, slightly more technical), or iPhone apps like Photo Stitcher 360 ($5-10 one-time). Load the 12 source photos, the software detects overlap and aligns them automatically, output is an equirectangular JPG ready for any 360 viewer.
What size should an iPhone 360 photo be?
For real estate virtual tours, target 4,096 × 2,048 pixels minimum for the equirectangular output. iPhone Panorama mode captures around 11,000 × 3,000 (wide but not 2:1 ratio). Street View’s stitched output is typically 4,096 × 2,048 or higher. Most virtual tour platforms accept up to 12,000 × 6,000 — bigger files = sharper zoom but slower load.
Can the iPhone’s native Camera app take true 360 photos?
No. The native Camera app’s Panorama mode captures a wide horizontal sweep (up to ~340°) but not a true 360 spherical image. For real spherical 360 capture on iPhone, you need a third-party app like Google Street View, an iPhone-paired 360 camera, or a tripod-rotator workflow with desktop stitching software.
The bottom line
For real estate agents in 2026, taking 360 photos on iPhone lives on a spectrum:
- Casual / one-off social posts: native Panorama mode, no apps needed
- Real estate virtual tour images for MLS: Google Street View app — free and produces true 360 spherical output
- Professional 360 capture for marketing: tripod + 360 rotator + iPhone + desktop stitching software
- Commercial-grade 360: dedicated 360 camera (Insta360 X4, Ricoh Theta Z1) — only worth it at 5+ listings/month
But the bigger insight: AI virtual tour tools have made dedicated 360 capture optional for most listings. If your goal is a buyer-navigable virtual tour on Zillow, Realtor.com, or your agent IDX site, you can build it from the regular wide-angle iPhone photos you already shoot — no Panorama, no tripod, no stitching, no $1,500 camera.
For the AI-from-regular-photos workflow specifically, BrightShot’s virtual tour builder takes 8-12 iPhone photos and produces a navigable 360° tour with hotspots in under a minute. Free plan, no credit card.
Want to go deeper on the photo capture itself? Our how to take real estate photos guide covers the iPhone settings, lighting decisions, and room-by-room shoot list that turns a regular iPhone capture into MLS-ready listing photography. The 360 layer just sits on top of getting the photos right in the first place.